Delicious is a social bookmarking site which has been around for a long time. You can find more detailed information about the history of Delicious here(http://en.wikipedia.org/wiki/Delicious_(website))
I started using Delicious as an online bookmarking site about four years ago, which is a donkey’s age in computer terms. I don’t even remember what computer I was using 4 years ago! Over that time, I’ve collected about 4800 bookmarks, 2000 tags and shared them with family, friends and colleagues.
In this post, I’m going to tell you how I use Delicious to share resources among my teaching colleagues on Twitter, Delicious, email as well as here on Digital Literacies. However, keep in mind, that I am not an expert, so for more detailed descriptions on how to do various indepth tasks, you need to check out the Delicious online help files here: http://delicious.com/help
Getting Started:
As I mentioned earlier, I have been using Delicious for quite a while, so the sign up process is different from what it was. Nevertheless, it is still quite straightforward.
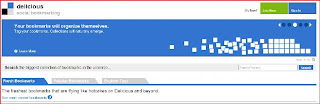
Briefly, here is what the buttons do on the landing page:
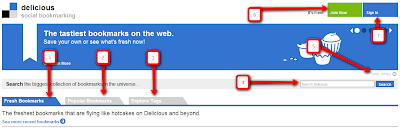
1. This tab is open by default to show the reader the latest webpages being bookmarked by Delicious account holders. 2. Popular Bookmarks: pretty self explanatory really...
3. Explore tags: which is where you can see what pages are popular within certain tags.
4. Search Delicious: again pretty self explanatory.
5. Hide Intro: minimises the big blue welcome bar.
6. Join Now!: This is where you need to go if you want to actually use Delicious to save and share your bookmarks.
7. Sign In: once you have an account, you will use this button and enter your Yahoo! ID and password.
Once you have joined Delicious, you can start using it to save the treasures you find around the web, bookmark and tag them for easy retrieval and sharing.
Once you have your new account, it is a good idea to install the Delicious browser buttons which will look like this on FF3.5:

The button on the left takes you to your Delicious page which will show your bookmarks. The middle button will open a sidebar in your browser where you can search your own bookmarks and go directly to a site you saved earlier. The button on the right is grey when you are at a page which has not been saved. It will turn blue when you already have the page saved in Delicious.
Saving a Webpage:
I’m now going to review the process of saving a bookmark and sharing it with a colleague:
1. Make sure you have signed in to Delicious and that you have installed the browser toolbar buttons referred to above. Suggestion – import your browser bookmarks to Delicious as well.
2. Once we are at a site we like, we naturally want to bookmark it. So, find the little grey tag symbol referred to above (the one on the right) in your browser toolbar and click on it.
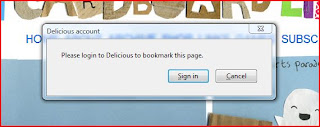
3. If you haven’t signed in to Delicious, you will see this window:
4. If you have signed in, then you will see this window:
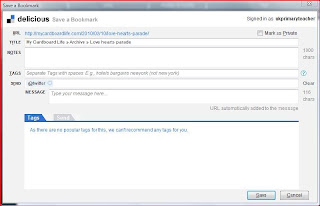
Before continuing, let’s briefly look at the different parts of the “Save a Bookmark” window. In the top right corner, you will see your username. Immediately below that, is the box which, if you don’t want to share the bookmark, will need to be selected. Selecting the box does not mean that others will not see it. But, you must send them the bookmark using the “Send” tab at the bottom of the window (which I’ll discuss later).
Down the left side of the window you will notice 6 headings (URL, TITLE, NOTES, TAGS, SEND and MESSAGE):
URL: This will show the address of your bookmark in full.
TITLE: The title of the website and the page you are bookmarking.
NOTES: In this section you can leave brief notes about the page, but remember that the notes will be visible on your public page if you choose to share the bookmark.
TAGS: Clicking inside the TAGS textbox will produce lists of both “Recommended” and “Popular” tags in the “Tags” tab at the bottom of the window. Individual tags can then be selected by clicking on them. Other tags can be added simply by typing the tag in the textbox. Remember to leave a space between tags.
SEND: Clicking in the “Send” textbox will activate the “Send” tab at the bottom of the window. Here, all your Delicious network members will be listed. Simply click on a network member to send the bookmark to. This area will also give you the options of emailing the link directly to another person (even if they are not on Delicious) and to send a tweet about the bookmark on Twitter. If you do send the bookmark as a tweet, make sure that a brief message about the link is included in the message box. Reminder: If you choose to keep your bookmark PUBLIC, your network will be provided with your bookmark automatically.
MESSAGE: As indicated above you can include a short message with your link when sending to a member of your Delicious network or for Twitter.
Finally, click “Save” and the window will close. Your bookmark is now saved.
Sharing
Saving a great educational resource for later use is fine, but what makes Delicious indispensible from my perspective is the ability to access your bookmarks from any networked computer and the ability of your PLN (Professional Learning Network) to be included in each other's discoveries which could be the seed of professional growth. Here is a little graphic I’ve put together to illustrate this simple but important concept:
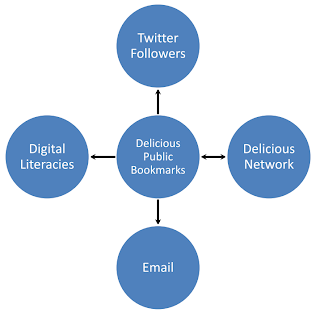
Basically, what I am trying to show here is the fact that my Public Bookmarks, represented by the centre circle, are shared with My Delicious Network and vice versa. I have not included a bidirectional arrow to indicate the one way sharing relationship with my email contacts through the Delicious interface. Furthermore, through the “Send” tab I can share my bookmarks, however, the relationship from my Twitter followers is not reciprocal within Delicious. I have, therefore not included a bidirectional arrow. This however belies the reality that there is a significant flow of knowledge opportunities from Twitter and email which can be included in Delicious.
Finding Colleagues to Share With
To turn Delicious into an even more useful site than simply storing links is the ability to share. However, we cannot do that really effectively until we have a network to share our (and our colleagues) discoveries. So, the next stage is to set up a network on Delicious, so the “Send” tab in our “Save a Bookmark” window becomes more useful.
I began by sending out an email to all my colleagues asking them if they were on Delicious, and if so, could they add me to their network. So, we simply traded Delicious usernames, visited the other’s Delicious page and clicked “Add User to My Network” which appears in the top right of the screen.
Further down the right side of the screen on your homepage, will be a list of the members of your network.
On several occasions while visiting a blog or other website, the author has made their Delicious credentials available. To add them to your network, it is usually simply a matter of clicking on their username and their Delicious public bookmarks page will appear. Look to the top right of the page and, as long as you are already signed in on Delicious, find the “Add to My Network” link and click!
The Benefits of Sharing
The benefits of sharing on Delicious are quite obvious. Including colleagues whose judgement you trust and who could be, or are, in your PLN helps to support professional development through discovery of new ideas, theories and opportunities as well as tools which we would not have discovered on our own, or which question or support our pedagogical beliefs. By including colleagues whose opinions you trust, you can be assured that links and resources which are shared have high educational value to you personally and reduces the time spent sifting through resources which may have little relevance for your particular situation.
Which resource sharing tools do you use? Do you use more than one? How have you found tools such as Delicious and Plurk useful?


